Showing posts with label How to. Show all posts

Sunday, July 29, 2012

How to make a pinball machine from a cardboard box


If you haven't watched the story about Caine's Arcade, do it now!
After watching (and crying of course) I read a post about a boy named Ezra, who, inspired by Caine, created a cardboard pinball machine. 
So I was inspired to create my own.

Here's how I did it.

What you need:
- a box
- wooden tongue depressors or popsicle sticks
- tape
- various items for obstacles eg. toilet paper rolls, cottage cheese containers, cd's
- decorating items eg. stickers

Instructions:

1.  Take a cardboard box, cut off the front and tape up all the sides.


2.  Use a scissors or craft knife to cut holes in the sides for your levers.
(I mistakenly cut high at first, the ball just falls under the levers *duh) so cut them as low as possible)


3. Tape two sticks together to form the desired length for each lever. 


4.  Use toilet paper rolls to achieve the desired angle for the machine by taping/glueing them to the back of the box.


5.  Tape or glue a long paper towel tube for the ball dispensor


6.  Tape or glue obstacles


7.  Decorate and Enjoy playing !!!


Happy crafting everyone.

and if you have young children, be sure to check out my new website about Baby Signing. 

Thursday, July 19, 2012

How to make a car from a toilet paper roll


This classy car for my wooden doll, was inspired by Mama Jenn's sports car which is featured (with instructions) on  Preschool Crafts for Kids. 

To make it even easier for you to make your own car, I've made a video showing you exactly what to do.  You can see it on here.

What you need:
- toilet paper roll
- paint
- scissors
- pen / pencil OR push pin
- 4 bottle caps (equal size)
- hammer and small nail  OR push pin
- a little bit of playdough
- optional:  a drinking straw OR piece of cardboard & glue

Instructions:
Step One:  paint roll and leave to dry
Step Two:  cut square for driver, and poke 4 holes where the wheels need to go
Step Three:  (optional: put two straws in through the two sets of holes respectively), insert toothpicks
Step Four: make holes in the caps and attach them onto the toothpicks, using playdough to secure them.


Now that you have such a cool car, need somewhere to park it...

Thursday, July 12, 2012

How to make a pencil case from a plastic food bag

how to make a pencil case

I was inspired to try this project after watching a Terracycle youtube video on how to make a coin purse from a plastic food bag.


However, I like taking the easy way out and my bag already had 3 closed sides, I was definitely not cutting new pieces just to sew them back together.
My personal no. 1 rule of upcycling is take advantage of as many seams as you can. (okay so that's for clothing, but why should plastic be different?).

So here's how I did it...
recycle plastic food bag
What you need:
1.  a strong plastic, empty, rinsed, food bag.
2.  scissors
3.  a zipper that's a little longer than the opening of the bag
4.  thick needle
5.  color-coordinated thread.


Instructions:
Step 1:  Use your scissors to cut the bag at the height that you want your pencil case to be.
  (admission of guilt: being as lazy as I am, and not owning a ruler *gasp*, I estimated the height on each side rather than measuring equal sides, which is why the final product's a little skew).

sew a zipper


Step 2:  Tape the zipper to the edge of your bag. 

how to sew a zipper

Step 3: Hand sew the zipper to the bag with a double layer of normal thread and a thick(ish) needle.
I say hand sew, because if you have kept the original three sides like I did, it would be very difficult and probably impossible to maneuver around the sewing machine.

how to sew a zipperhow to sew a pencil case
Step 4:  Sew the edges of the zipper together and tuck them in.


And that's it!  In only four short steps, you have a fully functional upcycled pencil case.

how to make a pencil case

Happy Upcycling!

Remember, I loooove your comments:
Would your kids find an upcycled pencil case cool? or geeky?

Saturday, June 23, 2012

How to turn a pink elephant party green

Since beginning my going green journey, I've done a lot of online research and found so many different ideas and challenges for leading a more eco-friendly life.  I'm especially attracted to the reduce, re-use and recycling concepts and feel that until now I've missed out the perfect opportunity to embrace these concepts - kids' birthday parties.

The most recent birthday party we hosted, was for my 4 year old.  I'm not a big fan of creating  themes for parties at this age, however, I am a very big fan of cakes.  Growing up, my mom let us choose an original cake from the Australian Weekly's original cake book for each birthday.  I have fantastic memories of my and my three sisters' elaborate (for that time) cakes; and I let my daughters choose their cakes from that book too.

Australian Weekly Cake


In April, 4 year old Eliya chose the pink elephant for her birthday cake.  It's probably my least favourite cake in the book, so I girled it up a bit when I did it, but it still resembles the picture in the book.  The rest of the party kindof fell into place around the cake.

1. Pink-ish decor. 
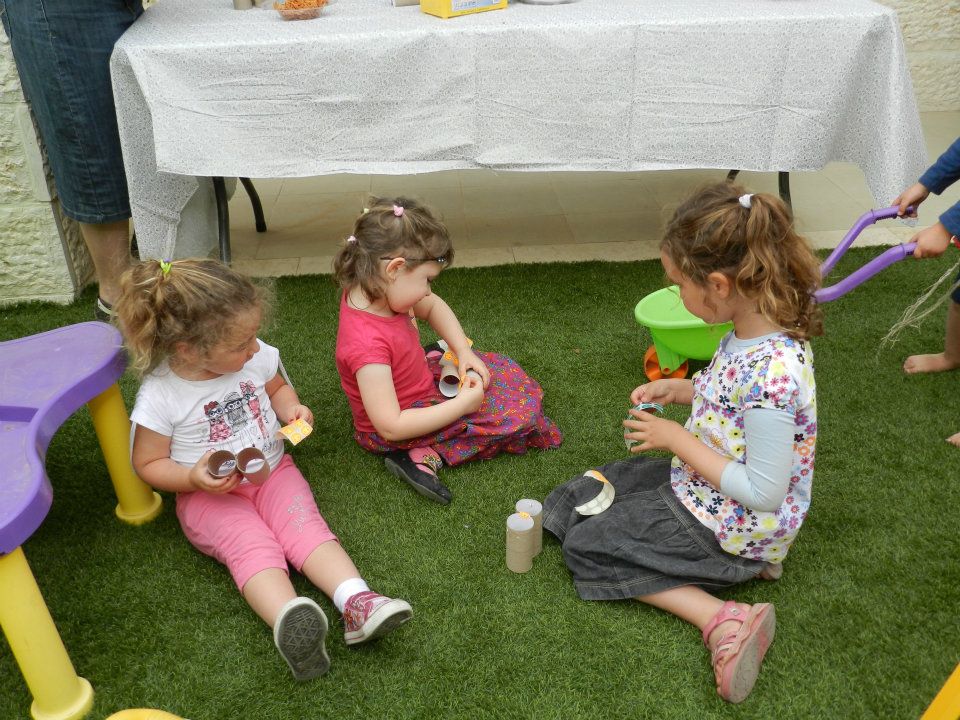
2. First activity: make binoculars out of toilet paper rolls.  I stapled two rolls together, and punched holes before the kids' arrived in hope of being organised.  I set out different crayons and pencils as well as stickers for decorating.  The kids then chose a pair of binoculars, decorated as they wished and chose a piece of pre-cut ribbon to thread in the holes and tie around their neck.
If you're wondering how this fits into birthday theme:- binoculars - safari - elephant

Activity Children's Party

3. Second activity: ice cookies.  I bought paper cookie 'plates' and after my cookie baking failed, placed a store-bought cookie in each 'plate'.  I then set out several bowls of different colored icing and bowls of decorative sprinkles and gave each child a plastic knife.  The kids loved decorating and tasting.  Please don't ask how this fits into birthday theme:- pink elephant - pink icing?


4. Pink Elephant Cake - see above.
5. Going Home Presents: plastic bags *wince* filled with binoculars, wrapped iced-cookies and a small plastic camera (if you look in the camera you see photos of animals -fits into theme:- pink elephant - safari - animal photos).


A happy birthday girl showing off her creations

And now, to answer the title of this post...
How would I turn this pink elephant party green?
1.  I would use far less disposables and try to use my real dishes, at least for the adults
2.  If I wanted to be adventurous, I could make the cookie plates from old cardboard/paper
3.  I would definitely not buy the goodie-bags, and either just hand out their gifts with no bags, or make an alternative.  I'm planning a future party where I fill a home-made carton wallet with sweets and give that instead of a goodie-bag.
4.  I think the cheap, plastic camera toy was unnecessary.

So hopefully, the next birthday party I plan and post will live up to my going green ideals.

Happy party-planning everyone

Monday, June 18, 2012

How to be productive with old birthday cards?

Are you a hoarder?
I'm definitely not a hoarder.
I just don't like throwing certain things away
In particular, sentimental things.
I especially don't like throwing away birthday cards. 

As a child, my mom kept all my birthday cards and glued them into a book for me.  I really enjoyed reading through those birthday cards for many years, until one day I decided to emigrate.  Moving countries, is a true hoarding/sentimental/prioritising test.  Before moving, I got rid of a lot of sentimental stuff that I really didn't need, I also kept a lot of sentimental stuff that I really didn't need.  Somewhere in the move I threw out my birthday card books.

The bonus in growing up and not having as many big birthday parties, is that I don't receive as many birthday cards, and I don't need to decide what to do with them.  My parents send me e-cards (which are GREAT ) there are personal messages, no carbon footprint, and I can just archive the link in my gmail.  That way, I never get rid of it, yet it doesn't take up any space. 

However, since having kids, the birthday card problem has returned.  Here are two of my solutions.

One:  Birthday-card decoupaged furniture.
Below is a pic of a wooden drawer set in my daughters' bedroom.

Here is a close up - you can see that I am in the ongoing process of using modge podge to decoupage their birthday cards (from their birth and first two years) onto the wood.  On the top, I also used pretty paper napkins over the birthday cards.  When I complete the decoupaging, I intend to paint over with varnish.


Two:  Framed Wedding Card Art


When given a wedding card, the meaning is not only in the words scribbled inside, but also the choice of the card design itself.  I cut out the designs from several of our wedding cards and placed them in divided frames to create a meaningful piece of art for our living room.


Something Different
The final project that I'm sharing, was actually designed by my mother-in-law and doesn't incorporate birthday cards.  However, it is in line with the theme of meaningful home decor.  My eldest daughter was named after my mother-in-law's parents and she collected several items from their home and had the items incorporated into a wall-hanging.

The general concepts in the design such as the blue birds, the cricket bat etc all have particular meaning.  Additionally, the flowers and trees were made with fabric from their curtains, pieces of clothing were used for the little girls' dress, and badges were incorporated into the balloons.  My daughter now has a piece of art that tells her a story about her great grand-parents for whom she was named.


Happy crafting everyone, and please share more ideas for meaningful home decor.

Thursday, May 31, 2012

Exercise & Learning Lessons.

Everyone knows that exercise is important.  As a doctor, I tell people every day how important exercise is.  Yet, like many people, I just don't enjoy exercising.  The closest I ever got to enjoying exercise was riding a bike.  Now that's fun.  Plus, using a bike instead of a car, is definitely part of going green, and would score me big points in my saving the environment challenge

So I thought about buying a bike, even a secondhand bike, but I didn't want to fall into the trap of paying money for exercise equipment that is not going to be used.  My first consideration was hiring a bike, certain cities (eg. Tel Aviv) have 'green bike' programs where you can rent and return bikes at docking stations throughout the city.  The concept is brilliant.  They've called it Tel-O-fun - see... I told you bikes are fun!
Unfortunately Modiin, does not yet have a Tel-O-fun system, and hiring a bike from my local bike shop just wasn't worth it.
Fortunately, my parents had an old bike lying unused in their garage (for the last  +-20 years) and they sent it to me with a friends' furniture shipment.

With no more excuses left, I 'upcycled' my broken bike with some new tyres and rode home.


Now which of you can spot the problem with the picture on the right of me riding the bike?
Don't cheat and scroll down to the rest of the story.
If you can't see it, ask your kids, they may be able to pick it out.

....
...
...
...
Answer: No helmet

The first place I rode to, was my book swap group. 
I got a lot of  "wow, that's impressive", even more of  "are you serious?"
and quite a few "Why do you not have a helmet!!?!*" 
To which I replied something about, well I don't ride fast, I'm just trying it out, I'm on the sidewalk not on the road blah blah blah...

The second place I rode to, was a meeting about e-cards.
On the way back, just a few metres from home, I crossed the road, at an angle, with a bump and fell.
Several "Oh my word, I'm so stupid"s later, I was in the semi-emergency room having a laceration on my face glued and a couple scrapes cleaned and bandaged.

I thought of posting the gory picture of me with blood dripping down my face, but some people consider that stuff gross.  So here's a pic of me with my bandaged eye and bruises.
  

The next day, I went to buy a helmet. 

Happy exercising everyone.

Wednesday, May 30, 2012

How to make a kitchen from a cardboard box

Yesterday I spent the afternoon, building a kitchen... for my kids... from a cardboard box.

I found my inspiration on the Disney Family Fun site. and made a few adjustments.
Their plan is for a double unit, one part stove, one part cupbard & sink, but I wanted it to fit into my kids' plastic outdoor house.  The house could only fit one box, so I combined the sink and stove units and sacrificed some cupboard space.
DIY recycled play kitchen

Materials:
large cardboard box  (I used an old moving box left behind after our kids' stuff swap.)
colored tape  (I couldn't find any colored packing tape, so I got the kind they use for electric cables)
craft knife (I put too much strain on my splice precision knife, -my fault, I still recommend the knife,- and found that a sharp scissors, and kitchen knife can also work if neccessary)
rimmed bowl (I try to avoid going out to buy MORE stuff, so I used an extra one from my kitchen)
soap dispensor pump (apologies to my sister Shiri who has no dispensor for her soap now)
plastic caps (I used ones without holes)
nail & hammer
screws & plugs (honestly, I didnt even use the plugs in the end, as the screws were stuck into the thick cardboard, but depending the thickness of your box, perhaps have them in case)
stay-tab from top of soda can (do you have a better name for it?)
CD's
permanent marker

Cardboard kitchen with oven and stoveHow to make a cardboard kitchen
Instructions:

1. turn cardboard box upside down
2. outline rimmed bowl on the top of the box, where you'd like your sink to be, and then use a craft knife to cut a circle about 1cm smaller than the bowl's diameter, then place your bowl inside. Consider using glue or tape to keep it in place.
3. make a small hole for a faucet and place the soap dispensor pump inside
4. draw a rectangle for the oven and use craft knife to cut out the top and sides of the oven.
5. use permanent marker to appropriately decorate the stove burners and stick them onto stovetop with superglue or glue gun.  I also put a piece of red tape under each of the burners, which gives the impression of a 'hot working stove'.
6. make holes in the caps, insert the screws and then push them into the box to make the knobs
7. use colored tape over hard jagged edges and for decor.
8. attach a stay-tab or alternative to just above the oven door with a screw to keep the oven door closed.
(Warning: after looking for a picture of a stay-tab, I saw several warnings regarding how they are choking hazards, if there will be small children playing with this kitchen, I would suggest using something else to close the oven, eg. a rectangular lid, that can swivel from horizontal to vertical thereby keeping the oven closed)

Enjoy making your own!

Tuesday, May 29, 2012

How to grow tomatoes from seed

Growing tomatoes is supposed to be very easy, and in my short experience, if you don't forget the watering, it really is.  I found a simple youtube video which gives clear guidelines on how to grow tomatoes from seed.


I used this Morgan & Thompson youtube video as a guide and made a few modifications.
Firstly, I did not invest in packet tomato seeds, and simply used the seeds from overripe baby tomatoes left in my fridge and destined for the trash.
I read somewhere that egg cartons make a good starting 'pot' as the water drains through them.
So I took half an egg carton, put it out on my kitchen windowsill and filled it with a nice compost mix (now I have no experience and no idea what makes a GOOD compost mix, so I simply used the only mix that my local garden store sells).
I then squeezed out the seeds (pips) from a few baby tomatoes - I actually used many baby tomatoes, on successive days as I didn't really have faith that they would grow.
But they did grow.

Tomato plant seedling in egg carton

The first time that I tried to grow tomatoes by seed, I didn't water them, and surprisingly, they didn't grow, so this time I was very religious about watering them well every day. 

And they grew, and grew and grew and grew.

It was really fun for the kids (and even more so for me) to watch the tiny germinated seedlings and note the appearance of the cotelydon leaves, and then the true leaves.  It was almost like my seedlings were acting straight from Renee's Garden's script. 

Tomato seedlings in egg cartonAfter the appearance of the first true leaves, I followed the instructions and transplanted to small pots.  My windowsill was full of little pots and I begged friends and family to 'adopt some of my seedlings', new seedlings continued to germinate in the egg carton but for lack of space and 'adoptive families', I had to put them out where they quickly dried out. 
I've read a lot about hardening off plants that were started from seeds indoors - I'm not sure if a windowsill is considered indoors - but for lack of patience I never hardened off any plants, and simply moved a few of them to a semi-shaded spot on the edge of the garden when I ran out of prime windowsill space.  Actually I would say those plants have done the best, so far.  Two of those outside plants were designated for my daughters, they each helped to transplant them and water them and it's very exciting as we watch the the plants literally grow from day to day.

Tomato plants grown from seed

Today I decided it was time to transplant my kids' tomato plants into their final destination.  Here's a video of how I did that.

Happy tomato growing everyone, if you have tomato plants too, let me know how they're going, and feel free to leave me tips.

Sunday, May 27, 2012

How to make a dollhouse from a cardboard box.

I grew up in a house with four girls, a big dollhouse and lots of plastic dolls.  I have great memories of playing with the dollhouse with my sisters and wanted the same for my kids - without buying an expensive dollhouse and plastic dolls which would probably end up destroyed in the dumps polluting the environment that I'm trying to save.

DIY cardboard box dollhouse

So I did a bit of research online, and decided to make a dollhouse from a cardboard box.
(I must admit that I found so many different examples of cardboard dollhouses online, that I'm not sure who to credit for my final design.)

Items needed:
a big box
scraps of wrapping paper
glue
tape
furniture magazines

Instructions:
Step 1: Find a box (I used the box from my sewing machine).
Step 2: Cut off the top 2/3 of the front side of the box.
Step 3: The bottom 1/3 that's left can be laid flat to represent the garden, and the bottom of the box taped shut.
Step 4:  Use the top 2/3 of the front that you have cut away to make the upper floor (second storey) (you may need to further cut it to size).
Step 5: Use strips of remaining cardboard and tape to reinforce the upper floor, ( I later added a piece of cardboard as a divider between the bottom 2 rooms which further reinforces the upper floor.
Step 6: Tape down old wrapping paper as the wallpaper/carpeting for each room.
Step 7: Cut out pictures of furniture and decor (eg. clock, closet etc) from magazines and glue onto the walls
Step 8: Spraypaint roof and outside of house (I still haven't done this...), paint garden green...
Step 9: Fill your house with furniture, we used furniture that we had been given as gifts, sand toy as the 'bath', I made a fridge from a small medicine box.  Check out this link for a great way to make recycled doll furniture.  (I already had furniture given as a gift, so I just modified those instructions for my toilet seat.

wooden peg dolls

The dolls in my house are a great alternative to plastic dolls (which break easier and I'm assuming are harder on the environment than these wooden dolls).
A friend of mine bought them for me from Etsy and we used craft koki's (markers) to color them.  You can also go to the general Etsy page and search wooden dolls to buy already-colored dolls, however I recommend doing them yourself - its fun and cathartic. 
I've since found that you can buy a variety of wooden people cheaper on Amazon  (using specifically the above link to amazon helps support my blog).

Colored wooden peg dolls

Hope you have lots of fun with your dolls and dollhouses, let me know how they turn out via  twitter or facebook.

This post is also featured on:

Tip Junkie handmade projects Serenity you